Category: Painting Contractor

House Painters

House Painters Anchorage specializes in painting a home’s interior or exterior walls. They may work for themselves as independent contractors or for larger painting companies.

Hiring a professional house painter can save you time and money. A skilled crew can finish a painting job within weeks that might take you months to complete yourself.

House Painters

House Painters provide a cost-effective way to refresh your home’s look, indoors and out. In addition to improving its aesthetic, a fresh coat of paint can help protect your home from damage caused by weather and time. These benefits make hiring a house painting company worth the investment.

A good house painting company will work with you to understand your needs and provide an accurate estimate. The quote should cover all costs associated with your project, including materials and labor. Indirect costs, such as the monthly payment on a work truck, overhead and salaries for support staff are also included in the estimate. These expenses can add up quickly, especially if you’re paying for a large project with multiple rooms.

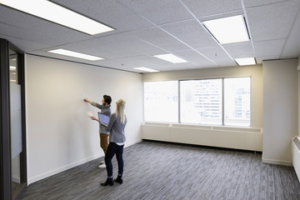
Professional house painters have years of experience working on both residential and commercial properties. They are familiar with all types of paints and finishes and can advise you on the best options for your home. They are also aware of the proper preparation techniques to ensure the smooth and even coating that you desire. They will help you select the right colors that will complement your home and create a modern, stylish look. They will also help you select wallpaper and other decorative elements that will add depth to your space.

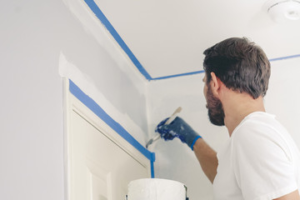
Besides their experience, most professional house painters have all the tools needed to complete the job. Their equipment includes spray guns, ladders and various sized brushes and rollers. In some cases, they may also use power washers to clean the surface before applying paint. They also use air masks to protect their eyes and lungs from harmful volatile organic compounds (VOC) released by the paint products they work with.

The cost of hiring a house painting company depends on several factors, including the size and location of the property. A two-bedroom home, for example, will cost more to paint than a one-bedroom apartment. Other factors include the number of rooms that need to be painted, as well as the condition of the walls. Heavily textured walls require extra prep work and will increase the overall cost of the project.

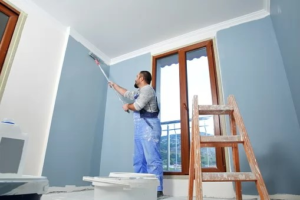
House painters transform living spaces by applying color and finishes to walls, ceilings, doors, windows, trim and other surfaces. They work to ensure a flawless, high-quality finish and can help make recommendations for colors, paint types and other finishing products. A quality painting job will increase the value of your home and enhance its aesthetic.

There are no specific qualifications required to become a house painter, though some may have completed formal training or apprenticeship programs. A good house painter will have a steady hand and upper body strength, as well as an eye for detail. It is also important that they take care not to damage furniture or flooring, covering them up with protective covers where necessary.

A successful house painter will have excellent communication skills and be able to work independently. They should be able to follow directions, meet deadlines and budget requirements. They should also be familiar with safety rules and regulations when working on ladders, scaffolding or other elevated locations. They should also be able to work with a variety of tools, including power and manual paintbrushes, rollers, brushes and spray guns.

Some of the main duties of a house painter include creating accurate quotes for each project, purchasing and mixing the correct quantities of paint for each job, and preparing surfaces before painting. They may also be responsible for removing wallpaper and stucco, scraping, sanding, caulking, patching and repairing surfaces prior to painting.

In addition to their painting skills, a house painter should have a high attention to detail and be patient when working with clients. They should also be willing to work overtime if required by the client. In addition to this, a good house painter will have a clean driving license and be insured for their work.

Choosing the right house painter for your next home improvement project can be tricky. Look for a company that offers digital quotes without the need for a walkthrough and has an extensive portfolio of previous projects. Check out reviews on social media and ask for references to help you choose the best fit for your needs.

Painting a house is a labor-intensive project that can take a long time. The process involves sanding, priming, and applying multiple coats of paint. Fortunately, professional house painters have a range of tools and techniques that allow them to work faster and more efficiently than amateurs. These techniques include using advanced tools, implementing streamlined processes, and detailed planning. Moreover, painters who are constantly learning and adapting to the industry can improve their productivity significantly.

Most amateur painters don’t have the right equipment for the job. In addition to basic painting brushes and rollers, you’ll need to invest in extension ladders and scaffolding for large jobs. Moreover, the large number of tools will make it challenging to store and transport them around. Hiring a painting contractor will save you the hassle of investing in expensive tools and equipment.

Skilled and experienced house painters can finish a job in less time than an amateur, saving you money on labor costs. They also know how to prepare surfaces and apply paint correctly, resulting in higher-quality results that last longer.

A fresh coat of paint can do wonders for a home’s curb appeal. It can boost its resale value and transform a once dull and outdated house into something more attractive. Additionally, a professional house painter will ensure that all the rooms are painted in the same color, making your property look more cohesive and appealing.

It is essential to clear the space from knick-knacks, picture frames, and other decorative items that may get damaged during the painting process. In addition, you should cover or move your furniture to another room before the painters arrive. This will help to protect your belongings and minimize the amount of cleanup after the job is completed.

During the estimate process, it’s important to understand all the costs involved. There are two types of prices: direct and indirect. Indirect costs are those that aren’t directly related to the job, such as the monthly payment on the contractor’s equipment, the cost of utilities, and the salary for their crew. Understanding these costs can help you better negotiate your final price estimate.

A fresh coat of paint does wonders for the curb appeal of your home. It can increase your property value and make it more attractive to potential buyers if you ever decide to sell your house. House painters are known for their meticulous attention to detail, and they take the time to mask off areas, fix imperfections, and apply the paint with precision. This attention to detail results in a polished, seamless result that is sure to impress your guests and friends.

Peace of mind is a mental and emotional state of calmness and tranquility, free from worries, fears, and stress. It’s a mindset of contentment and satisfaction that allows you to enjoy your life despite the challenges you may face. It’s a state of inner stillness that gives you more control over your thoughts, and it can help you become a more positive person in general.

The phrase “peace of mind” is used a lot in popular culture, including the famous quote from Jonathan Swift’s 1726 satirical novel Gulliver’s Travels, where the narrator describes the Laputians as never enjoying a moment’s peace of mind. The expression is also used in other English-language literature and thinkers, from Mary Wollstonecraft to D.H. Lawrence.

Having peace of mind is an important aspect of your mental health, and it can be difficult to achieve. It’s a state of mind that you can cultivate by taking some steps to reduce the amount of stress in your life. It’s a matter of choosing to focus on the things that are important and letting go of the things that aren’t.

One common way to achieve peace of mind is to get a new job or career. Another is to spend some time away from technology, social media, and other distractions. You can also improve your mood by exercising, eating well, and spending quality time with loved ones. It’s essential to find a balance between work and life to keep your mind happy and healthy. When you feel at peace, you can enjoy the beauty of your surroundings and find comfort in your personal space.

Interior Painting Techniques

A new coat of paint on the walls can revitalize a room and give your home an updated look. Walls are subject to wear and tear from physical scuffing, humidity, and sun exposure.

Interior painting is one of the most common home improvement projects. Painters can use many different painting styles to create unique aesthetics. Click https://bunburypaintingservice.com.au/ to learn more.

painting

Color washing is a popular paint technique that provides your living space a unique look and feels. It’s an easy and affordable method that gives you the opportunity to create a new backdrop for your decor. Whether your style is rustic or contemporary, a well-done color wash will help you achieve the aesthetic you desire for your home.

The basic steps of color washing begin with applying a base coat. While this may seem straightforward, the quality of the base coat is vital to a successful color wash finish. It’s important to choose a paint that is high-quality, and it should have a matte or satin finish to avoid any sheen. This type of finish will also allow the natural texture of your wall to show through.

Once the base coat has dried, it’s time to mix your glaze. A glaze is a thin mixture of paint and water that’s used to add dimension to your finished product. Different glazes can create a variety of looks, from a subtle sheen to a dramatic, almost translucent effect. It’s important to choose a color that complements the base coat and works with your space’s overall color scheme.

Next, prepare your tool for application. You can use a brush, sponge, or even rag to apply the glaze. The choice is completely up to you, but each will produce a different look. For example, a brush will provide a more defined look, while a sponge or rag will produce a softer, more diffused appearance.

Once you have your tool prepared, apply the first layer of your glaze to the wall using random strokes. Then, apply a second layer in the same fashion, being sure to blend the colors together as you go. Continue this process until you reach the desired look.

When you’re finished, use a dry brush to diffuse the color and remove any lap lines. Remember, each color washing technique will produce a slightly different look, so it’s important to practice your technique on a hidden corner of your walls or a piece of furniture before you begin your project.

Ombre walls are having a real moment, but the truth is that this design trend can be incredibly tricky to pull off. Mastering the skills of freehand painting is one thing, but managing to blend a series of colors into a gradual gradient is another. Fortunately, there are now plenty of options available for anyone who wants to try their hand at this style.

This technique is popular in hair coloring, nail art, and clothing design, but it’s also a fantastic way to add color and texture to your home. The ombre effect is the gradual blending of hues from light to dark, and it’s something that interior painting professionals can help you achieve with ease.

The first step to creating a beautiful ombre wall is choosing your color scheme. Choose a shade that complements your existing décor, or go for something bolder to create a striking statement. If you’re struggling to decide, consider consulting a color wheel for inspiration. Analogous shades, those that sit next to each other on the wheel, will work best together.

Once you’ve chosen your shade, it’s time to start preparing the surface for painting. Use a good quality primer to ensure the paint will last and to ensure the ombre effect is even and smooth. Then, apply a coat of your chosen base colour. Remember to use oil-based paints, as they dry more slowly than latex.

Now it’s time to start adding your shades, starting with the lighter shade. Use a roller loaded with your light shade to cover the top part of the wall. Then, using the same roller, add a band of darker paint underneath the lighter shade. Finally, use a brush to blend the two colours together while they’re still wet.

If you want to make your ombre wall really pop, add a few accent pieces. These can be anything from furniture to window treatments, but make sure they match the overall color palette. For example, if you’re working with blues and greens, add some earthy toned furnishings and a leafy green house plant to tie the whole room together.

Stenciling is a technique in interior painting that involves passing paint or ink over perforations in a surface to create a pattern or design. The earliest stencils were made from paper or metal, but modern ones are often made out of plastic or mylar sheets. Stencil artists may use a wide variety of materials to create their works, including fabric, leather, glass, and wood. Stenciling is used in a broad range of art styles, from fine arts to graffiti and street art.

Stencils can be applied using any type of paint, but the best choice for this type of work is acrylic or chalk paints. These paints are thicker and provide better coverage than other types of paint. Moreover, they are also water-resistant and can resist scuffing and fingerprints. Moreover, they are available in an array of colors and can be mixed with each other to achieve the desired effect.

The most common stencils are simple shapes, such as circles and triangles. They are easy to cut and can be applied using either a roller or a brush. However, many artists also make stencils out of more complex designs, such as hearts and flowers. Stencils can be applied to almost any type of surface, but they are especially good for walls and furniture.

It is important to properly adhere the stencil to the surface before beginning to paint, as even a slight shift in position can ruin the result. Using masking tape, painter’s tape, or any other strong and temporary adhesive will help ensure that the stencil is held firmly in place while you are working.

Before beginning any stenciling project, you should clean the surface to be decorated with an approved cleaning method. Once the surface is cleaned, it should be wiped down and then prepped for stenciling. Depending on the surface, the stencil will be attached to the material using a spray adhesive or tape. The image on the paper should then be transferred to the stencil material using a utility knife or another method. After that, the stencil should be carefully cut out with a sharp utility knife or other suitable tool.

Cutting-in involves painting along trim that’s not protected by painter’s tape – such as edges of walls, ceiling lines, door frames, window frames, skirting boards, and architraves. It can be tricky for beginners but with the right technique it’s something that anyone can learn to do. The key is a good quality brush – one that’s thicker than a normal paintbrush and specifically designed for use with interior surfaces. Our Maverick interior brush is ideal for the job, as is a Maverick sash cutter brush (also known as an angle sash brush) or any other angled, bristle-loaded brush designed for interior use.

Once you’ve got a brush with the right type of bristle load and a steady hand, you need to practice. Start with a small square of wall, and then practice on different parts of that square until you feel comfortable with the shape and pressure of your strokes. A little bit of practice goes a long way in getting the line you want, so don’t be afraid to take your time and work with a light touch.

You should also remember to get in close to the area you’re working on – it makes it easier to control the brush and to see where your lines are going. You should also be sure to keep the brush wet as you’re working, as this will minimize orange peel and help the cut-in areas blend seamlessly with the rest of the paint.

Ideally, you should also paint the rest of the room after you’ve finished cutting in, as this will ensure that any orange peel and other imperfections are hidden by your roller coat. And finally, it’s always a good idea to make sure you’re working in a well-lit area, so that you can see what you’re doing and not accidentally get any paint on the surrounding trim or surface.

By following the tips above, you can avoid those pesky cutting in lines and create a professional looking painted finish on your interior walls or ceilings. But remember, if you’re not sure you have the skill to do it yourself, hiring a pro is always an option that could save you some time and hassle.

Preparing Walls For Interior Painting

Painters Wilmington DE have institutional knowledge about how to make walls look crisp and clean. They know all the little things that can make the difference between a good job and a great one.

Remove furniture as much as possible; cover what can’t be moved with drop cloths. Wash walls and woodwork with TSP to remove grease that interferes with paint adhesion.

painting

Color is one of the most impactful aspects of interior painting, transforming a room and setting a mood. However, choosing the right colors can be an overwhelming and intimidating task for many homeowners, especially when there are so many shades to choose from. A little knowledge can go a long way toward reducing the confusion, helping you make a color choice that is both beautiful and functional.

The first step is to determine the mood you want your space to evoke and pick a shade that will help achieve it. You should also consider existing factors that may influence the way a particular hue looks, such as the amount of natural light in the room and other permanent design elements like wood paneling or flooring. Then, take the time to carefully sample your choices. This is an important step that can save you the expense of buying gallons of paint you later regret.

A great way to test paint colors is to place them on two different walls and compare them under varying lighting conditions. Seeing how a color looks in the morning, in the sunlight, and at night will give you a better idea of what it will look like in your home and under your circumstances.

Another consideration is undertones. A white paint, for example, can have yellow, green or blue undertones that affect how it appears on the wall. These are called harmonies and can be subtle or dramatic, depending on your personal taste. It is important to pay attention to these harmonies when selecting paint colors so that you are happy with your decision and don’t find yourself regretting the shade down the road.

Once you’ve narrowed down your selections, consider taking a photo of each sample and uploading it to a website like Sherwin-Williams ColorSnap Visualizer so that you can see what they will look like on your walls with your furniture and other decor. This is a free tool that can be a valuable resource for anyone planning on painting their own home or business.

Finally, when you’re ready to make a decision, don’t be afraid to go big! Maggie says that her favorite advice is to “go all-in.” If you love a color, paint the walls, trim and ceiling in the same shade. This creates a cohesive feel in the space, keeps it from feeling too choppy and establishes balance.

A fresh coat of paint can revitalize worn-out walls and surfaces, making them look cleaner and newer. It also helps to update the color scheme, whether to reflect current styles or personal taste. But before painting can begin, the walls need to be properly prepared.

This step may seem like a minor one, but it’s crucial to the success of the final results. Washing the wall and sanding it down are important for ensuring that the new paint will adhere to the surface. It’s also necessary to fix any cracks and imperfections in the wall, including nail holes and dents.

These can be difficult to find and address on your own, but professional painters are trained to spot these problems. Getting rid of these flaws will ensure that the new paint doesn’t highlight them.

The next step in preparing the wall is to prime it. This will help to seal the surface and allow the pigment to penetrate more evenly. It’s also helpful for covering any existing marks or stains on the wall, such as water stains or marker and crayon. Marker and crayon will bleed through even several coats of paint, so you’ll want to cover them with a stainblocking primer (KILZ and B-I-N are two brands).

Another reason for priming is to provide a base layer that will help the new color bond to the wall more effectively. Without it, the new paint might start to chip or peel within a few months.

Finally, if you’re going with a dark color, a primer will help the pigment to hide any natural light from showing through. This will make the room feel more secluded and cozy.

It’s also important to protect any furniture or belongings that can’t be moved during the painting process. Carpets, wood floors and other flooring should be covered with tarps to prevent any spills or drips from damaging them. A professional painting company will have these supplies on hand, but you can also purchase a roll of tarp at most home improvement stores. Keeping your things safe will give you peace of mind while the work is being done and ensure that everything will be in its place when the job is finished.

Painting is more than just buying a can of paint and slapping it on the wall. It’s a process that involves a lot of preparation in order to get good results and ensure that the paint adheres properly and won’t chip or peel later on. In addition, cleaning walls before painting is important for the overall health of your home.

First, you will need to remove furniture and other possessions from the area that is going to be painted. If you can’t move the items, cover them with tarps or drop cloths to prevent damage during the painting process. It’s also a good idea to vacuum the area to get rid of dust and other debris.

Next, you will need to wash the walls. You can use a mild detergent or a pressure washer. Then, you will need to dry the surface thoroughly before you can start painting.

After washing the walls, you will need to sand them down. If you have any cracks or dents in the wall, now is the time to repair them. If you don’t fix these issues before you paint, the new paint will be visible and detract from the overall look of the room.

Once the sanding is done, you can apply the primer. This will help the new paint adhere to the wall and will make it smoother. There are a few different types of primers that you can choose from, including oil-based, latex, and shellac. Oil-based primers are typically the best choice for most surfaces because they provide a high level of adhesion and are resistant to mold and mildew.

Finally, you will need to caulk all the gaps and cracks in the wall. This will help prevent water and other liquids from seeping through the wall and damaging it. It’s important to clean the caulking before and after you apply it in order to ensure that it works properly.

Interior painting is a great way to update your home and change the look of a room. It can also improve the value of your home and make it more appealing to potential buyers.

A fresh coat of paint can transform a room and give it a whole new look. It can also hide scuffs, scratches and other damage. A good quality paint job can even help to mask odors from cooking and smoking. It’s a great way to update an outdated look and if you are thinking of selling your home it can increase its appeal to potential buyers.

Many older paints emit harmful chemicals into the air that can lead to poor indoor air quality, mold and other problems. By using newer low-VOC paints, you can improve the air quality in your home and protect it from fungi. Mold-resistant paints are now available, and these can be used in kitchens and bathrooms where condensation is often a problem.

Before painting, it’s a good idea to clean the walls thoroughly. This can be done with a mild soap solution or a pressure washer. Once the surface is clean, it’s important to check for cracks and holes that need to be filled. It’s a good idea to use a silicone-based filler as it will not expand once it dries, unlike conventional plaster. It is important to hollow out any cracks and holes carefully to prevent unsightly lines in the finished paint job.

Once the patched areas have dried, it is a good idea to lightly sand them. This will prepare the wall for the primer, and it will help to ensure that the final paint job will be smooth. If the walls are in bad condition, it may be necessary to do more extensive sanding depending on the previous finish on the wall and the state of the existing paint.

It’s also a good idea to clean the trim and moldings. It’s a good idea to clean these with a damp cloth or soapy water to remove any dirt or grime. You should also wipe down any doors and windows to remove any residue from fingerprints or smudges. Once the walls and trim are cleaned, it’s time to start painting. Using high-quality paints will help to ensure that the finish on the wall is smooth and long-lasting.

Hiring a House Painter

Painting a room can be an easy DIY project that offers dramatic results. However, entrusting the job to professionals can ensure better quality and long-term durability. For more information, just visit House Painter to proceed.

Many licensed house painters begin their careers through apprenticeships, working under an experienced master painter. The work environment is typically indoors, though outdoor jobs are also possible. The position requires standing for long periods and moving your upper body.

When hiring a painter, looking at their previous work and customer reviews is important. It’s also essential to know what kind of materials they use, as this can affect the outcome of your project. You should also consider the company’s pricing structure and payment terms. A professional house painter can provide a detailed quotation after visiting your home.

The type of paint you choose can dramatically change the appearance of a room. The color of the paint, sheen, and adhesiveness all impact how your walls look. Choosing a paint that matches your home’s flooring, furnishings, and architectural details is important. A house painter can help you select the right type of paint for your project.

Once you have narrowed down your color options, test them on the wall to ensure they will look good once applied. This is especially important if you are painting over existing colors. Darker paints may need two coats to hide what is underneath, while lighter colors will require only one. It is also good to see how the paints look at different times of day and night.

When choosing a paint color, visit your local store and pick up some paint samples in your desired color range. Once you get them home, paint a 2-foot by 2-foot section of each color on your wall and live with it for a few days to see how the color looks at various times of day.

Almost all residential and commercial painting contractors offer labor-only warranties that last up to two years. Some painters also carry product warranties that last longer. These additional warranties can give you peace of mind, knowing that the painter will fix it if something goes wrong.

Regardless of the warranty length, it would be best to ask a painting contractor about their work guarantee and whether it covers the cost of any necessary repairs or replacements. Most reputable contractors will have references from past customers that can attest to their quality of work.

A house painter is a professional who can complete painting projects on homes and other buildings. Unlike other occupations, no set education is needed to become a house painter, and most people learn the skills through on-the-job experience. A person who wants to be a house painter needs to have a steady hand and upper body strength, as well as a good eye for color and an understanding of the aesthetics of a room. Some painters may also specialize in certain styles or finishes, such as faux painting.

When hiring a house painter, get a written estimate and description of the work to be completed. The house painter should also provide a timeline for completing the job. Most homeowners will obtain several estimates from different contractors before choosing one to complete the project.

Before beginning any work, a house painter will generally clean the surfaces to be painted and prep them as necessary. This may include sanding, priming, and cleaning. This will help ensure that the finished product is high-quality and that the new coat of paint adheres properly.

It is often helpful for a homeowner to remove small hard furnishings from rooms scheduled for painting. This can prevent furniture damage from accidental drips and spatters of paint. For larger items, such as sofas, suites, and beds, a garage or storage space is usually sufficient to house them during the painting process. It is also helpful for a homeowner to cover any light fixtures, such as chandeliers and wall hangings, with plastic to protect them from dust and other debris during the painting process.

Many interior house painters appreciate it when their clients take some preparation steps before the start of the work. This helps minimize the time spent preparing for painting, resulting in a better-finished product that will last longer. For example, it is helpful to move furniture to the center of the room or cover it with a sheet so that it is not in the way while the painter works.

You are responsible for painting inside and outside homes as a house painter. This job requires great attention to detail and an ability to work for long periods while standing and moving your upper body. It is also important that you have a good understanding of how to use different tools, such as brushes and rollers, to ensure a smooth finish.

Depending on the size of your project, you may have to complete your work in stages. Before you begin painting, you must take precautions to protect surfaces such as carpeting and furniture from damage. You may also need to repair any holes or blemishes before painting the surface. Additionally, if you are working on an exterior paint job, it is often necessary to power wash the surface before applying new coatings.

Most homeowners will get multiple quotes from house painters before choosing one to complete their project. Ensure the quote outlines the project scope, a completion timeline, and labor and material costs. This will help you determine which painting contractor offers the best value for your money.

A professional house painter should always be insured and licensed. This will protect you and your home if a worker is injured or your property gets damaged. Also, a licensed house painter is likelier to have a high skill level and knowledge about the industry.

When hiring a house painter, it is important to find out how many years of experience they have and whether or not they have any past projects you can view. You can also ask for references from previous clients and contact them to inquire about the quality of work.

Finally, check if the house painter has special requirements for working on certain structures. For example, you should look for a house painter with a lead safety certification if you work on a building built before 1978. This is because renovation work can expose lead, which is hazardous to children and adults.

The final inspection is the last opportunity for an owner to review work before a certificate of occupancy or closing can take place. This is also the time for the homeowner to determine if all outstanding issues have been resolved, such as replacing a missing or damaged outlet cover or patching a hole from a removed TV bracket.

As the day approaches for the inspector’s arrival, it is a good idea to prepare by reviewing expected requirements for a final inspection and establishing documentation systems to ensure all information is accurate and easily accessible. These best practices will help minimize delays, rework, and failures and facilitate a smooth settlement process.

Some of the most common code violations found during a walk-through of a new home or major remodel are related to deviating from an approved electrical plan. The most frequent reason for this is simply moving an outlet or adding a switch to make room for something else, but it can be very dangerous. Inspectors will only pass outlets in their planned location and typically require covers on all outlets.

Another issue that is sometimes overlooked during a final inspection is mold. This can be a serious health concern, so it is important to make sure that all surfaces are free of mold and dampness before the inspector arrives. This may be as simple as running your hands firmly along the wall, as the slightest moisture can indicate an active mold problem.

It is also important to conduct all required inspections before the final inspection, including foundation, framing, and mechanical, electrical, plumbing, and fire inspections. Lastly, all outstanding safety hazards should be addressed, such as fixing leaks, cracks, and gaps in the structure and ensuring all equipment is properly installed and functioning.

Navigation