A new coat of paint on the walls can revitalize a room and give your home an updated look. Walls are subject to wear and tear from physical scuffing, humidity, and sun exposure.
Interior painting is one of the most common home improvement projects. Painters can use many different painting styles to create unique aesthetics. Click https://bunburypaintingservice.com.au/ to learn more.
Color washing is a popular paint technique that provides your living space a unique look and feels. It’s an easy and affordable method that gives you the opportunity to create a new backdrop for your decor. Whether your style is rustic or contemporary, a well-done color wash will help you achieve the aesthetic you desire for your home.
The basic steps of color washing begin with applying a base coat. While this may seem straightforward, the quality of the base coat is vital to a successful color wash finish. It’s important to choose a paint that is high-quality, and it should have a matte or satin finish to avoid any sheen. This type of finish will also allow the natural texture of your wall to show through.
Once the base coat has dried, it’s time to mix your glaze. A glaze is a thin mixture of paint and water that’s used to add dimension to your finished product. Different glazes can create a variety of looks, from a subtle sheen to a dramatic, almost translucent effect. It’s important to choose a color that complements the base coat and works with your space’s overall color scheme.
Next, prepare your tool for application. You can use a brush, sponge, or even rag to apply the glaze. The choice is completely up to you, but each will produce a different look. For example, a brush will provide a more defined look, while a sponge or rag will produce a softer, more diffused appearance.
Once you have your tool prepared, apply the first layer of your glaze to the wall using random strokes. Then, apply a second layer in the same fashion, being sure to blend the colors together as you go. Continue this process until you reach the desired look.
When you’re finished, use a dry brush to diffuse the color and remove any lap lines. Remember, each color washing technique will produce a slightly different look, so it’s important to practice your technique on a hidden corner of your walls or a piece of furniture before you begin your project.
Ombre walls are having a real moment, but the truth is that this design trend can be incredibly tricky to pull off. Mastering the skills of freehand painting is one thing, but managing to blend a series of colors into a gradual gradient is another. Fortunately, there are now plenty of options available for anyone who wants to try their hand at this style.
This technique is popular in hair coloring, nail art, and clothing design, but it’s also a fantastic way to add color and texture to your home. The ombre effect is the gradual blending of hues from light to dark, and it’s something that interior painting professionals can help you achieve with ease.
The first step to creating a beautiful ombre wall is choosing your color scheme. Choose a shade that complements your existing décor, or go for something bolder to create a striking statement. If you’re struggling to decide, consider consulting a color wheel for inspiration. Analogous shades, those that sit next to each other on the wheel, will work best together.
Once you’ve chosen your shade, it’s time to start preparing the surface for painting. Use a good quality primer to ensure the paint will last and to ensure the ombre effect is even and smooth. Then, apply a coat of your chosen base colour. Remember to use oil-based paints, as they dry more slowly than latex.
Now it’s time to start adding your shades, starting with the lighter shade. Use a roller loaded with your light shade to cover the top part of the wall. Then, using the same roller, add a band of darker paint underneath the lighter shade. Finally, use a brush to blend the two colours together while they’re still wet.
If you want to make your ombre wall really pop, add a few accent pieces. These can be anything from furniture to window treatments, but make sure they match the overall color palette. For example, if you’re working with blues and greens, add some earthy toned furnishings and a leafy green house plant to tie the whole room together.
Stenciling is a technique in interior painting that involves passing paint or ink over perforations in a surface to create a pattern or design. The earliest stencils were made from paper or metal, but modern ones are often made out of plastic or mylar sheets. Stencil artists may use a wide variety of materials to create their works, including fabric, leather, glass, and wood. Stenciling is used in a broad range of art styles, from fine arts to graffiti and street art.
Stencils can be applied using any type of paint, but the best choice for this type of work is acrylic or chalk paints. These paints are thicker and provide better coverage than other types of paint. Moreover, they are also water-resistant and can resist scuffing and fingerprints. Moreover, they are available in an array of colors and can be mixed with each other to achieve the desired effect.
The most common stencils are simple shapes, such as circles and triangles. They are easy to cut and can be applied using either a roller or a brush. However, many artists also make stencils out of more complex designs, such as hearts and flowers. Stencils can be applied to almost any type of surface, but they are especially good for walls and furniture.
It is important to properly adhere the stencil to the surface before beginning to paint, as even a slight shift in position can ruin the result. Using masking tape, painter’s tape, or any other strong and temporary adhesive will help ensure that the stencil is held firmly in place while you are working.
Before beginning any stenciling project, you should clean the surface to be decorated with an approved cleaning method. Once the surface is cleaned, it should be wiped down and then prepped for stenciling. Depending on the surface, the stencil will be attached to the material using a spray adhesive or tape. The image on the paper should then be transferred to the stencil material using a utility knife or another method. After that, the stencil should be carefully cut out with a sharp utility knife or other suitable tool.
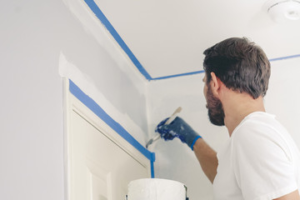
Cutting-in involves painting along trim that’s not protected by painter’s tape – such as edges of walls, ceiling lines, door frames, window frames, skirting boards, and architraves. It can be tricky for beginners but with the right technique it’s something that anyone can learn to do. The key is a good quality brush – one that’s thicker than a normal paintbrush and specifically designed for use with interior surfaces. Our Maverick interior brush is ideal for the job, as is a Maverick sash cutter brush (also known as an angle sash brush) or any other angled, bristle-loaded brush designed for interior use.
Once you’ve got a brush with the right type of bristle load and a steady hand, you need to practice. Start with a small square of wall, and then practice on different parts of that square until you feel comfortable with the shape and pressure of your strokes. A little bit of practice goes a long way in getting the line you want, so don’t be afraid to take your time and work with a light touch.
You should also remember to get in close to the area you’re working on – it makes it easier to control the brush and to see where your lines are going. You should also be sure to keep the brush wet as you’re working, as this will minimize orange peel and help the cut-in areas blend seamlessly with the rest of the paint.
Ideally, you should also paint the rest of the room after you’ve finished cutting in, as this will ensure that any orange peel and other imperfections are hidden by your roller coat. And finally, it’s always a good idea to make sure you’re working in a well-lit area, so that you can see what you’re doing and not accidentally get any paint on the surrounding trim or surface.
By following the tips above, you can avoid those pesky cutting in lines and create a professional looking painted finish on your interior walls or ceilings. But remember, if you’re not sure you have the skill to do it yourself, hiring a pro is always an option that could save you some time and hassle.